First things first, it's important to choose a model to build that you are actually interested in, and want to make. I came across the Trumpeter Soviet NKL-16 Aerosan Kit in Hobbies catalogue, and was intrigued by its appearance. It looked almost unreal, like nothing I had come across before and, with a price under £20, I decided to give it a go.

The Trumpeter Soviet NKL-16 Aerosan Kit consists of 151 parts on 9 trees, 86 photo etch detail parts and a short piece of copper wire.
First of all I had to look on Google to see just what these amazing vehicles actually looked like in real-life, and I found photos and read descriptions about how they worked.

A further search turned up some dioramas using the aerosan which were hugely inspiring.

It appears the NKL-16 Aerosan was introduced by the Soviet Union during World War II. It was made of plywood and was powered by an aircraft engine. Various models were built at car factories, and were always being improved. The Aerosans were organized into transport battalions.
You need a place to work. A laptray in front of the telly is probably not going to work successfully, so in my case, it was the dining room table, with a thick, protective tablecovering over it.
I quickly established that I would need a proper cutting surface, so that my knife didn't end up making holes in the table, so I purchased an inexpensive modellers' tool kit containing small cutting mat, hobby knife & spare blades, a sprue cutter ( so much better than hacking parts from the sprue with the knife), and a small file to 'clean up' the piece.
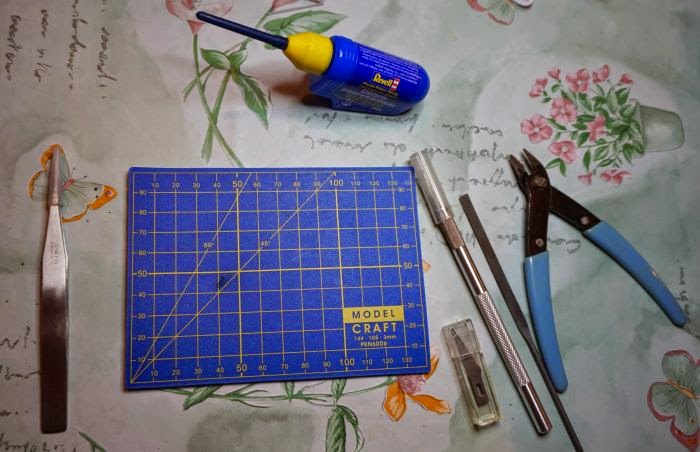
Tweezers are also 'essential' for handling 'fiddly' smaller parts.

Light Craft Fluorescent Daylight Compact Table Standing Magnifier Lamp not only gives clear, shadow-free light which is easy on the eyes, it gives perfect magnification allowing you to see smaller parts, making them easier to handle, glue, and paint.


Roket Rapid (Superglue) is perfect for sticking metal photo-etched pieces to plastic ( as well as the more traditional sticking fingers to forehead), but use Revell Contacta for 'plastic to plastic' applications.


TO BE CONTINUED . . .
No comments :
Post a Comment